Owen's Aquaponics - Shed System
Author: Owen Date Posted:3 October 2017
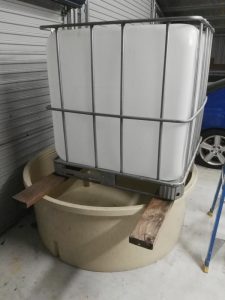
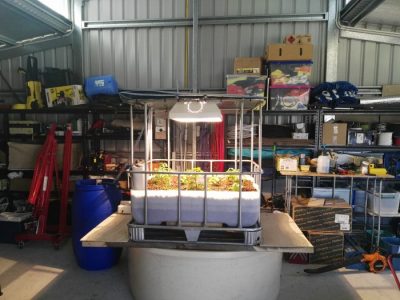
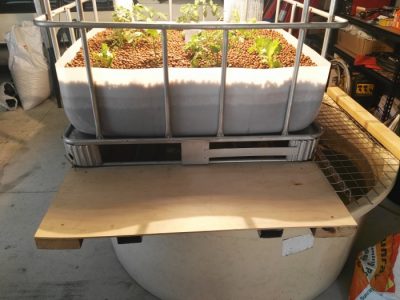
I would like to share my sixth (Yes I know, it may be getting out of hand round my place) aquaponics system. This system came to be from the sheer bulk of leftover parts I had after building my previous systems. One day while poking around the shed, I thought why not make use of the free bay I had, and build a indoor system that I could temperature control much easier than my outside ones. I had a spare stock trough that I was original using as a dump for my fish poo. So all I needed was a grow-bed. I called up a bloke I know that sells IBC's and managed to get my hands on the new style 1200L IBC measuring 1100 x 1100 x 1000.
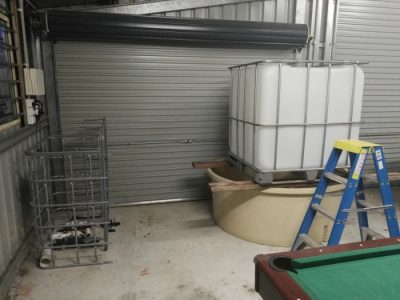
I used some leftover timber to support it on what would become the fish tank.
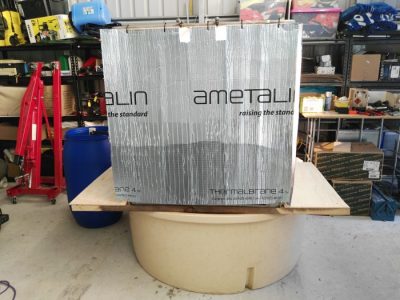
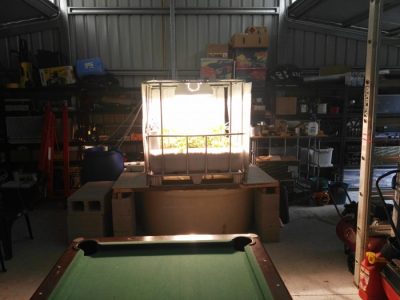
I still wasn't happy with the location, as I had to open a shed roller door, so I decided to re-arrange the shed for the system to utilise the larger centre bay. At the same time, I decided to add some reflective insulation sheeting to the sides to reflect more light once I had installed it. This is hung on the frame so they can be flicked up onto the top of the IBC frame for easier access. Some of the side bars of the IBC frame where then removed, but the decision was made to keep the frame mostly intact so I could have it as a home fashioned grow tent, as well as having a solid support structure for the light so I didn't have to hang it from the ceiling. The light is provided from a 315w LEC that I had previously been using in my patio system. Another 2 steel supports were added under the IBC frame in case the wood ever failed. As these protruded past the sides of the tank, I decided I would attach marine ply to them, to fashion some seats/work benches.
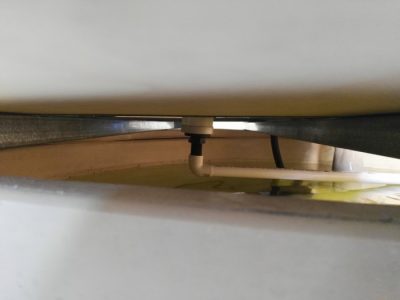
Once the IBC had been cut down, I installed a "Drop Siphon." This is the same design as a ordinary bell siphon, except instead of the bulkhead fitting being being installed into the bottom of the grow-bed, It is installed into a capped 90mm pipe. This is then pushed up into the base of the grow-bed using a 90mm uniseal. This allows the grow-bed to completely drain of water.
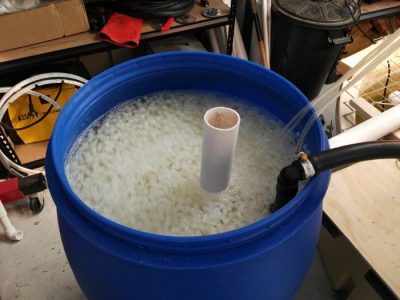
Once again like my larger system, I decided to add a bio-filter. This is a 220L plastic drum with about 100L of K1 bio media. A 5000lph pump was then installed to feed water the grow-bed and bio-filter, with a tap installed on the grow-bed feed line to control water flow into the bed. A SLO was then installed in the bio-filter to lift the water out, and back into the fish tank.
.jpg)
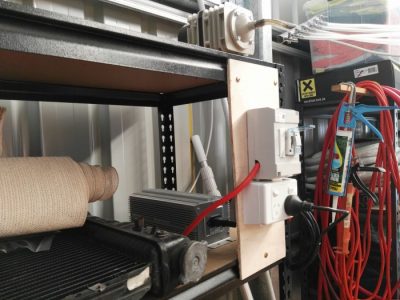
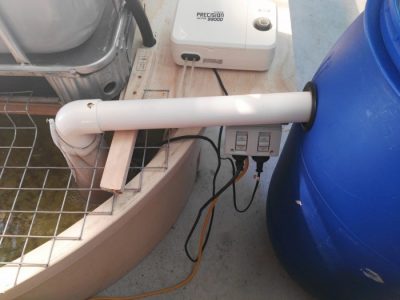
The air system was then installed. It consists of a 70LPM pump to the bio-filter and fish-tank. The airlines are run overhead so there is plenty of room to walk underneath them. A battery backup air pump was also installed. I then wired up the control system for the lighting and added a weatherproof power point so I didn't have 4 electrical cords run across the floor.
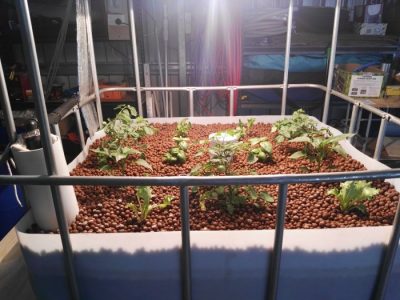
The light (315w LEC) was then sat on the rails of the IBC frame. Water was added to the system, clay media to the grow-bed, and a few seedlings were then added also. Below is the first test fire of the LEC after the above was completed.
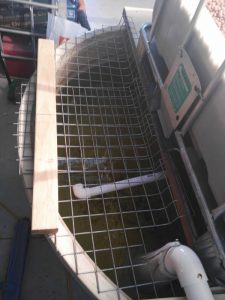
Wire mesh was then cut and bent into shape so that the fish couldn't jump out of the tank once grown. A 25mm pipe and 90° bend was also added to the bulkhead to make sure the returning water from the grow-bed creates a circular flow in the tank to aid in solids pickup by the pump and a more natural flowing environment for the fish.
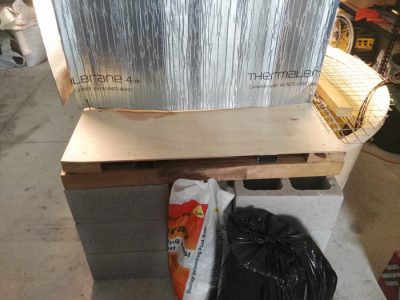
Unfortunately this weekend, upon inspection, it was found that the weight of the grow-bed on the fish tank was more than it could support and it had started to buckle under the pressure. Some bessa blocks were hastily purchased and the bed jacked up. to install them under. Although being a PITA to install after the fact, and not so easy on the eyes, it makes a good little alcove on either side where I can store my supplements for the systems.
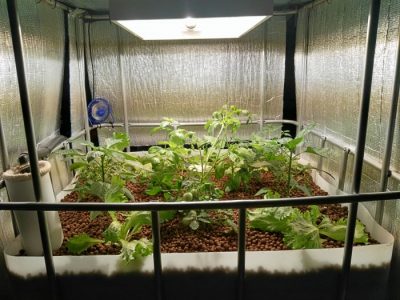
Some media from other established grow-beds was added, as well as some K1 from my larger system bio-filters to speed up the cycling process. The fish have also been added (Some larger perch and smaller barramundi) and according to my water tests, it had fully cycled in about a week. The heater from my larger system was then added to this system as I plan on only running silver perch in my big system from here on in. As they have a better temperature tolerance than the jade perch, the heater will be utilised so that I can keep barramundi all year round without the worry of them perishing during cold spells. A small fan was then added to help with pollination and airflow. Below is the growth comparison from the start till now, roughly 2 weeks between getting the system online.
Well that about wraps up the story of my shed system up till this point in time. I'll keep you posted how it goes.
Thanks for looking :)