Aquaponics and Black Soldier Fly Larvae
Author: Ben Date Posted:26 September 2017
Hi guys,
This is my attempt at so far getting an Aquaponics and BSFL system up and running. I have been reseaching Aquaponics for the past 5-6 years and only last November (2016) have I had the chance to actually have time (or money!) to do anything about it!
Forgive me if this is long, but it's been a long journey, and it ain't over yet!!
I started this journey courtesy of Murray Hallam - his information was the first to get me interested many years ago. I have attended several of Murrays' classes and they have always been of great help and very informative. I also found in the past year and a half a Youtube channel - Rob Bob's Backyard Farm and Aquaponics. Rob has been fantastic and his channel is always filled with great information.
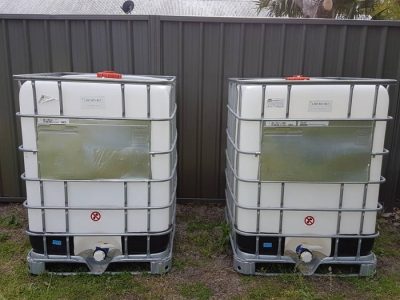
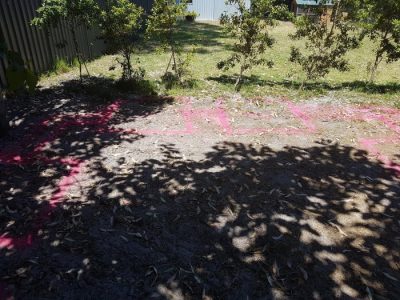
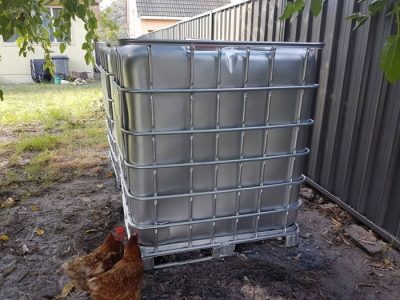
So we first got what will be our fish tanks from a company that was selling the IBC's - to start off with we only got 2... That was soon to change! We also knocked down some old building that were in the backyard to make way for the Aquaponics
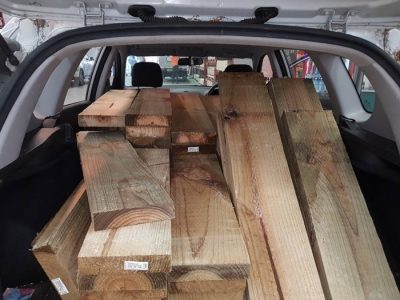
The next step (I figured) was to get the pumps - even before we started marking the ground we were buying the equipment! (Pumps are submersible 18000L/H 1500W Max Depth 8M along with Backup Solar Air Pump with air stones. Backup #2 a 100Ah Deep Cycle Battery housed in a waterproof box). However, we got the pump and the back up system and then started the mark out.
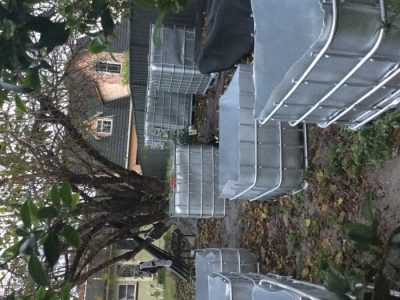
This is our set up (imagined) for our aquaponic garden. The size of our area is 6M x 7M
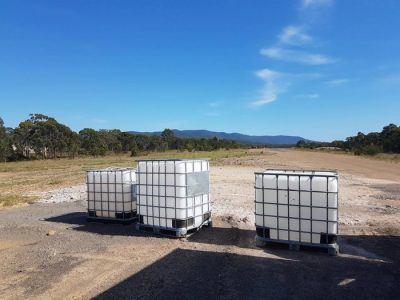
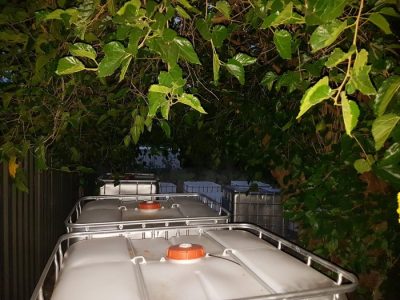
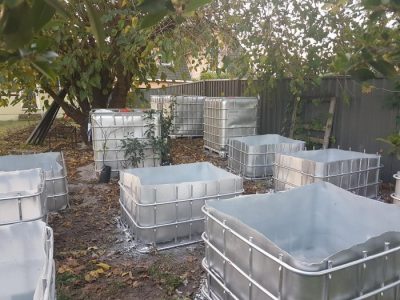
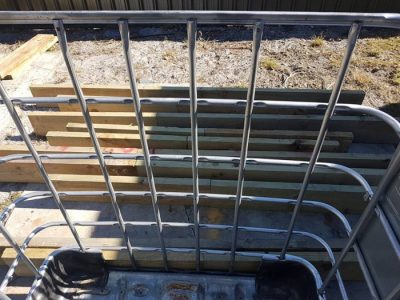
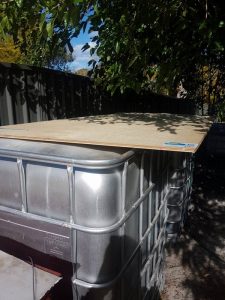
Our fish tanks are 1250L from Flow Systems (4 more to pick up - turned out to be 6!) - 2 will be for the tanks the remainder cut in half for the beds themselves.
We choose a different spot to where we first thought, as we managed to pin up another 8 IBC's from the same company. The spot we chose was where the old horse shed was, after we tore it down, we were able to use the space quite nicely - even the chooks seemed to like it!


We finally got the go ahead from the company (Flow Systems) to pick up the IBC's about 6 weeks after we purchased them as they were on an active building site - we rocked up with my dad on a 35deg day and waited for an hour for the foreman to turn up. The truck was not the best place to wait for the guys to turn up!
He eventually turned up and gave us access and we loaded the IBC's on the back of the truck - we had to leave 3 behind :( ... The truck just couldn't take them. The truck was packed to the rafters!

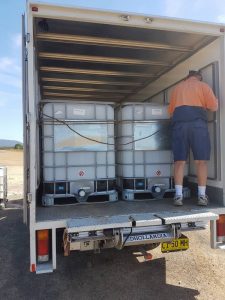
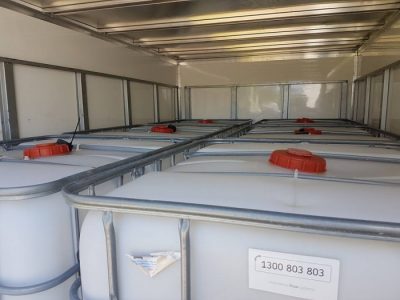
Those IBCs weigh a ton and getting them into place you can be assured that they aren't gonna be moved in a hurry when they get into place!
After we got them home, we set up the tanks where we wanted them (for the fish tanks). The chooks were wondering what the hell was going on. We spray painted them to stop the mould gathering in the tanks themselves
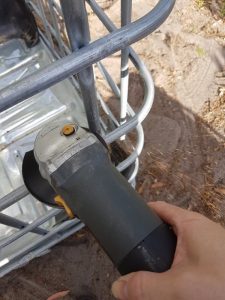
Got some hardwood timber to prop up the top halves of the IBC's as they don't have a solid footing, not like the bottom halves have. The only incident was when I copped a bit of hot metal to my hand when I was using the grinder of all things, but all good. I managed to get a nice cut on my hand from a piece of flying white hot metal... a very timely reminder to *always* wear gloves!
Working out the media was tricky. 119 * 99 * 60 cm = 0.71 m³ = 25.07 ft³... in other words, it is going to cost a bit to fill all the beds!
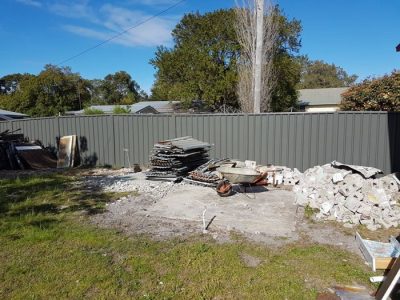
We managed to get them all cut up and positioned where we thought we wanted them. This is where things stalled for a few months due to a lack of a job mainly...

Things finally got back on track after we found another job and we got cracking on again. Now the sump tank (not tanks) was buried, but only by a few feet. I though this was good enough. As it turns out, it wasn't as you will see later.
BSFL
At this time, we also started looking at Black Soldier Fly Larve, to feed our chickens and fish, as well as disposing of food waste and the cooks waste as well. This is what it looked like on the youtube channel we were following (https://www.youtube.com/watch?v=s8f3B1G6lgY&t=5s) - what ours turned out to be was well, a monster compared!
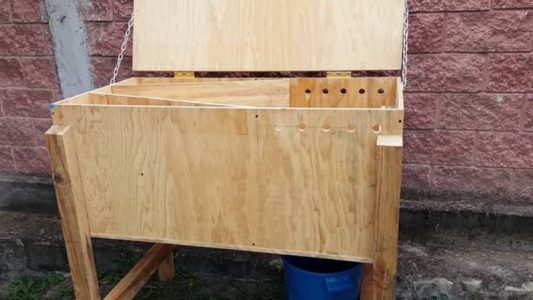
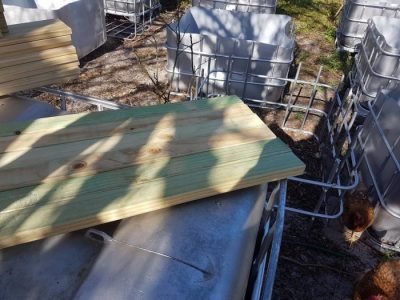
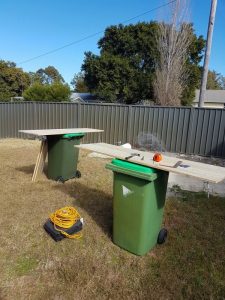
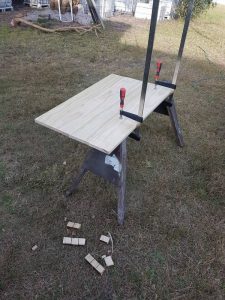
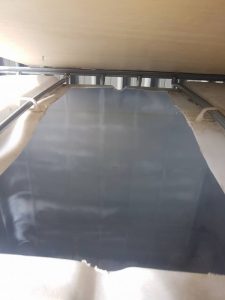
The build, I thought, was fairly straight forward. It helped getting clamps that were 1.8 mtrs in length so that I could clamp the together. It's sorta nice being able to cut something down to size! ![]() ?
?
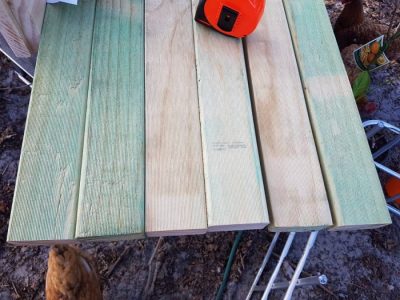
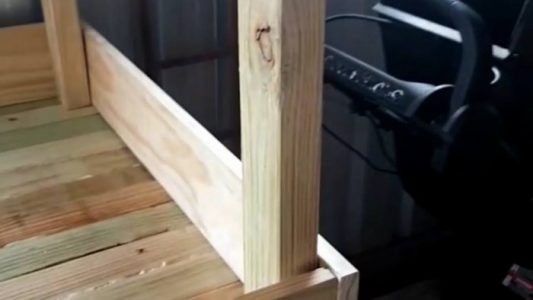
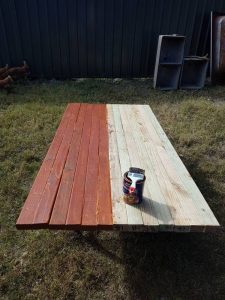
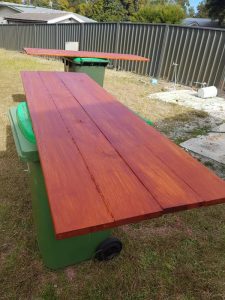
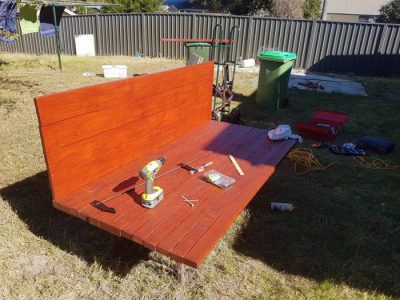
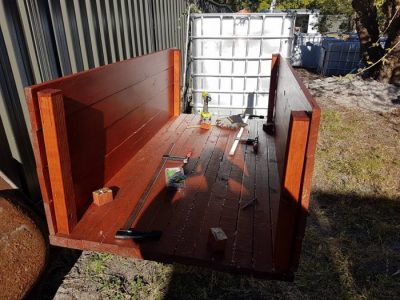
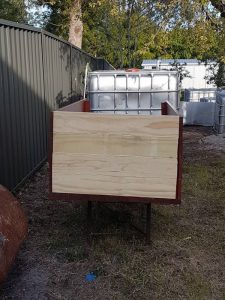
3 coats have been applied to one side for both the front and the back with the stain and weatherproofing. The holes have been pre-drilled ready for the final part. The puzzle pieces are finally coming together!
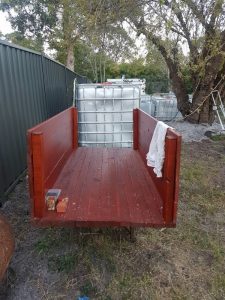
The front and back sit a bit higher than the sides, but I'm sure we can think of something (maybe a rubber seal?) to have everything sit flush.


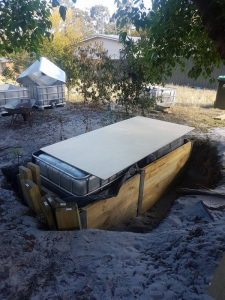
Well... we're back digging again! Many thanx to Rob's call this morning - (much appreciated mate!) it has been decided that I need more security with the sump, so that's exactly what I'm doing!
Found alot of "interesting" articles buried amongst the sand including a kettle! In even better news, the lid is finally on the BSF box and the plastic is settling nicely.
More digging tomorrow and for quite a few days to come as well if I'm any judge!
Digging suspended... It's actually quite amazing, we've found a Victorian Era Ink Bottle as well as a few rather old bottles (still to be indentified - circa 1940-50), this is starting to turn into an archeological dig!
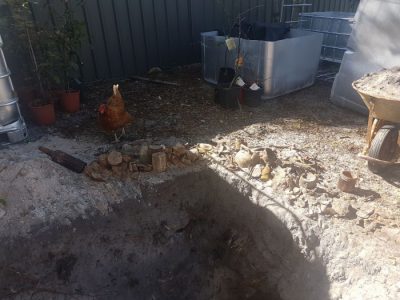
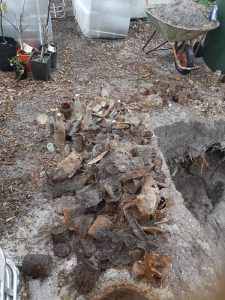
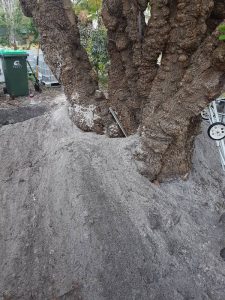
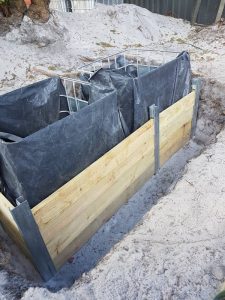
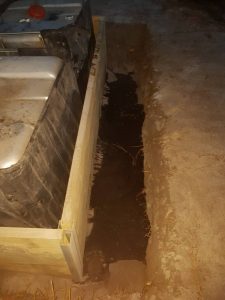
The dross is out! Now the digging can begin in earnest! 6 ft down working towards 3ft wide. Even my daughter decided to get in on the act and help me "dig" out some more sand... Although in saying that, I don't think our tree can handle much more! Working out just how much I moved Length 3.7M x Width 2M x Height 1M = 7.4 Cubic Meters! By hand!
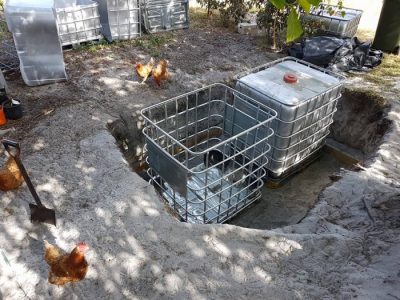
In, not settled, but in. Looks good!
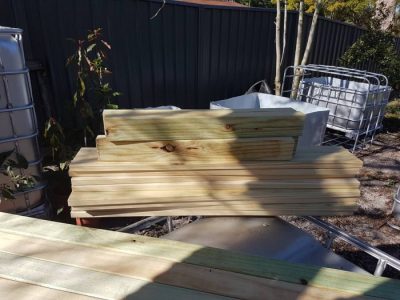
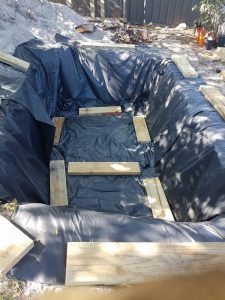
The sleepers have been bought along with the builders tarp. I stretched the capacity of my little beast by loading her down as I did. But, we made it... just!
I'll be laying that (the plastic) down first followed by the sleepers. I'll be glueing the boards together and then laying the tarp over the top.
Ok, so I've had a Barry Crocker. The measurements I took were at the top amd edge of the hole. I didn't measure from the bottom... so the wood that we had cut so carefully didn't fit...
So it looks like l will be doing some more digging...
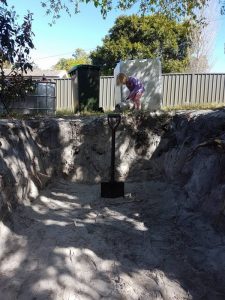
Ok, so I've decided to be sensible (I know, it's not in character) I decided after a week and half worth of digging to lay out the frame first to see it if fit!
First one out showed that I had dug, well, too much!
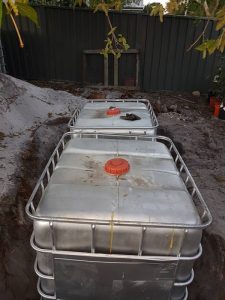
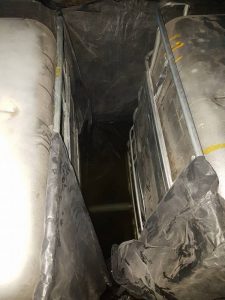
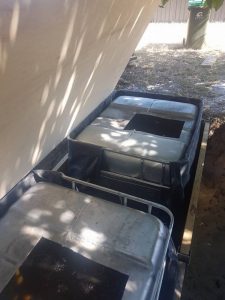
The tanks do fit however and very snugly at that, so maybe I wasn't too far off, then I remembered that we don't want the walls of the tank to be "squashed" by the sand/soil. So I moved the walls in. Looks alot better in my judgment.
The plastic will go around the outside coming in, then the soil/sand around the wall - all still giving access to the connection if needed.
On the up side apart from back and shoulders loudly complaining, I am now very much aware of how to build an underground greenhouse if needed!
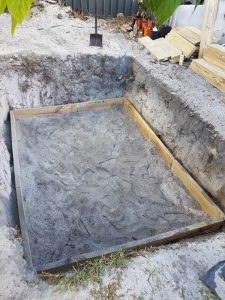
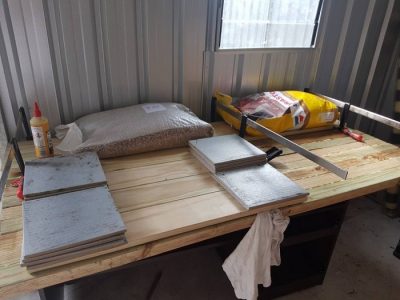
Stuff Up #1 Glueing boards on sand... not a good idea! Have everything lined up and measured and moved boards to a flat-ish place for glueing getting them ready for "the pit"!
Ok, so after struggling with the wood now for seval days, i have thrown my hands up in despair and asked an expert (read: absolutely anyone anyone with greater knowledge than me. i.e Everyone! - Thanx Bunnings! lol) what to do.
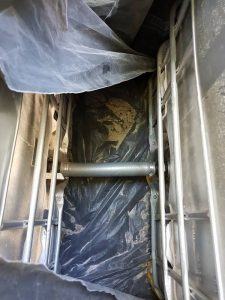
We have a solution that would of saved me hours of frustration if I knew about it earlier. These metal posts will cover 3/4 of the tank and with the plastic over the top it should form a solid unit.
Stuff up #2! What happens when you forget to add a seal at the end of the hose? You end up with a freakin' swimming pool! Almost 1000L rushed up to greet me. Not good considering the time of day (7:30 at night) nor the fact that the seal I was holding was swept away and is somewhere underneath the damned tanks!
What was a good day turned into a very wet and woeful one!
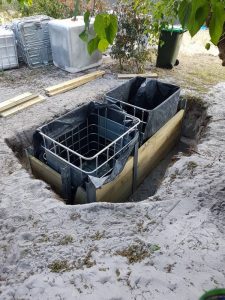
It took approx 2 hrs to dismantle and dig out some of the sand to allow access to the tank, but now it seems ok. Will certainly keep an eye on it over the next couple of days. I'll be connecting the fish tanks tonorrow and getting a cover for them as well as the sumps so that they can be "open". Beds are now set up, ready for the pipes to be laid and media fill. They have been slightly reduced in number due to lack of room.
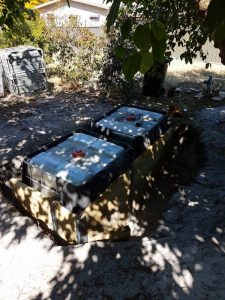
The lids are on for the fish tanks and they are also hooked up. Actually had to hop inside them the clean them up as there was some form of mould growing inside. Both tanks hold water well. Next is to cut open the sump tanks but not as much as we only need a smaller opening to get the pumps in.
Then just the syphons, the pipes, the media and the electrical work along with our backup system in place - just in case of power failure (and looking at our summer with the bushfires we've already had, the backup is gonna be used, of that I'm sure).
The tanks are now set up with their lids and are being stained tomorrow. Maybe spray painted... would be easier, thats for sure! lol
I certainly wasn't watching where I was going and ended up taking a good piece of skin off my shoulder and a bruise to match after noting to myself that the shelf overlapped the tanks. I've hammered a 6 ft star picket into the ground next to the offending corner in hopes of avoiding that again...
I have sealed 3 of the 4 tanks with silicon to avoid rain run off
The guys is still a pipe dream. I will hopefully be able to crack on some more next month, connecting the tanks and fitting the syphons. Then the media, but that's another story!